How to install and harden SSH
Last updated on

Contents
Introduction
Installing an SSH server can be very useful to manage your files from outside your home and knowing it encrypts the traffic one can remain relieved that the data is secure. Today we are going to install one and secure it!
This is part of a Server Setup series that I’m planning on doing including email, VPN, FTP… So stay tuned! ✌
Installing
To install it we just need to update our apps and repositories and install OpenSSH:
sudo apt update -y
sudo apt upgrade -y
sudo apt install openssh-server
Then we can verify if it’s running with:
sudo systemctl status ssh
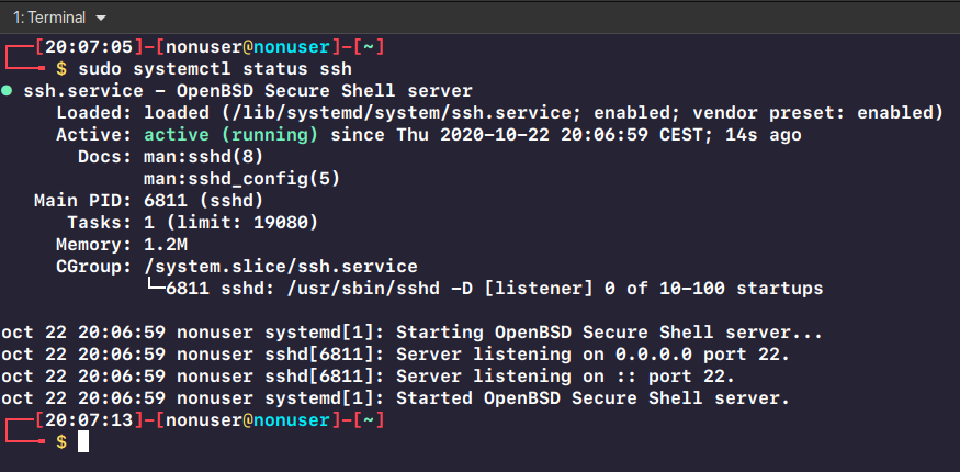
If it’s not running, we can start the SSH service with:
sudo systemctl start ssh
We can enable it to run every time we boot the PC:
sudo systemctl enable ssh
Firewall
In order to access SSH from outside the network, you need to allow incoming connections at port 22.
sudo ufw allow ssh
sudo ufw enable
sudo ufw status
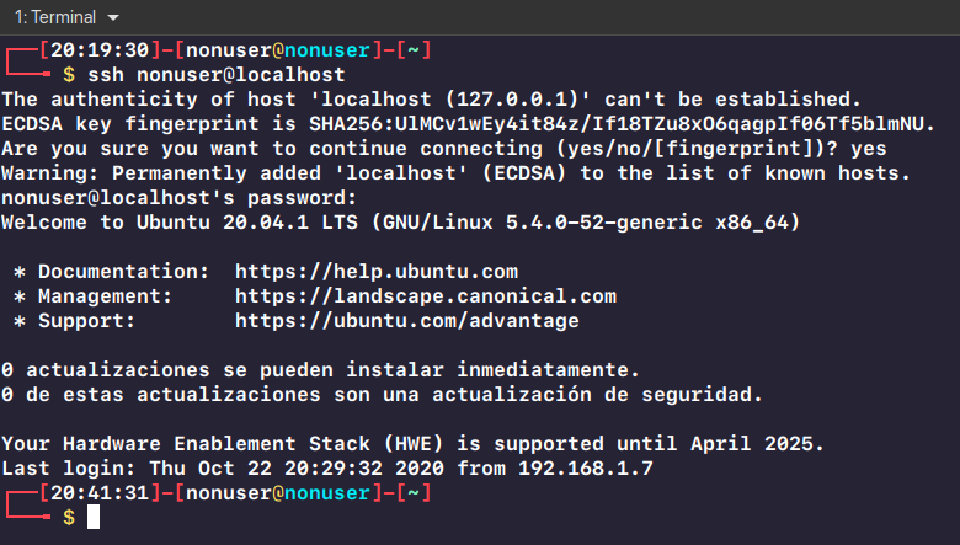
At this point, we can already use the SSH to connect!
Hardening
Even that SSH is encrypting our traffic cybercriminals can still perform some attacks on it depending on how it’s configured. It’s time to secure it!
I’ve put a lot of options to secure it, so choose whichever you like!
You have the list here.
Here is the default SSH config file from /etc/ssh/sshd_config:
# $OpenBSD: sshd_config,v 1.103 2018/04/09 20:41:22 tj Exp $

# This is the sshd server system-wide configuration file.  See
# sshd_config(5) for more information.

# This sshd was compiled with PATH=/usr/bin:/bin:/usr/sbin:/sbin

# The strategy used for options in the default sshd_config shipped with
# OpenSSH is to specify options with their default value where
# possible, but leave them commented.  Uncommented options override the
# default value.

Include /etc/ssh/sshd_config.d/*.conf

#Port 22
#AddressFamily any
#ListenAddress 0.0.0.0
#ListenAddress ::

#HostKey /etc/ssh/ssh_host_rsa_key
#HostKey /etc/ssh/ssh_host_ecdsa_key
#HostKey /etc/ssh/ssh_host_ed25519_key

# Ciphers and keying
#RekeyLimit default none

# Logging
#SyslogFacility AUTH
#LogLevel INFO

# Authentication:

#LoginGraceTime 2m
#PermitRootLogin prohibit-password
#StrictModes yes
#MaxAuthTries 6
#MaxSessions 10

#PubkeyAuthentication yes

# Expect .ssh/authorized_keys2 to be disregarded by default in future.
#AuthorizedKeysFile .ssh/authorized_keys .ssh/authorized_keys2

#AuthorizedPrincipalsFile none

#AuthorizedKeysCommand none
#AuthorizedKeysCommandUser nobody

# For this to work you will also need host keys in /etc/ssh/ssh_known_hosts
#HostbasedAuthentication no
# Change to yes if you don't trust ~/.ssh/known_hosts for
# HostbasedAuthentication
#IgnoreUserKnownHosts no
# Don't read the user's ~/.rhosts and ~/.shosts files
#IgnoreRhosts yes

# To disable tunneled clear text passwords, change to no here!
#PasswordAuthentication yes
#PermitEmptyPasswords no

# Change to yes to enable challenge-response passwords (beware issues with
# some PAM modules and threads)
ChallengeResponseAuthentication no

# Kerberos options
#KerberosAuthentication no
#KerberosOrLocalPasswd yes
#KerberosTicketCleanup yes
#KerberosGetAFSToken no

# GSSAPI options
#GSSAPIAuthentication no
#GSSAPICleanupCredentials yes
#GSSAPIStrictAcceptorCheck yes
#GSSAPIKeyExchange no

# Set this to 'yes' to enable PAM authentication, account processing,
# and session processing. If this is enabled, PAM authentication will
# be allowed through the ChallengeResponseAuthentication and
# PasswordAuthentication.  Depending on your PAM configuration,
# PAM authentication via ChallengeResponseAuthentication may bypass
# the setting of "PermitRootLogin without-password".
# If you just want the PAM account and session checks to run without
# PAM authentication, then enable this but set PasswordAuthentication
# and ChallengeResponseAuthentication to 'no'.
UsePAM yes

#AllowAgentForwarding yes
#AllowTcpForwarding yes
#GatewayPorts no
X11Forwarding yes
#X11DisplayOffset 10
#X11UseLocalhost yes
#PermitTTY yes
PrintMotd no
#PrintLastLog yes
#TCPKeepAlive yes
#PermitUserEnvironment no
#Compression delayed
#ClientAliveInterval 0
#ClientAliveCountMax 3
#UseDNS no
#PidFile /var/run/sshd.pid
#MaxStartups 10:30:100
#PermitTunnel no
#ChrootDirectory none
#VersionAddendum none

# no default banner path
#Banner none

# Allow client to pass locale environment variables
AcceptEnv LANG LC_*

# override default of no subsystems
Subsystem sftp /usr/lib/openssh/sftp-server

# Example of overriding settings on a per-user basis
#Match User anoncvs
# X11Forwarding no
# AllowTcpForwarding no
# PermitTTY no
# ForceCommand cvs server
We will review some of these settings.
Changing SSH port
It’s advised for every service to change the port so cybercriminals have a harder time at poking your ports. And this allows having multiple SSH servers in a network.
To change the port we just modify the Port parameter from 22 to whatever we like. I’ve put 2222.
Result: Port 2222
It’s time to restart the service so changes are applied.
sudo systemctl restart ssh
Now we need to change the UFW rules.
If you run the command below you’ll see that we have set up the rules for port 22, but now we need to delete them and create them again.
sudo ufw status numbered
To delete the rules:
sudo ufw delete <number of rule>
And we add the rules again with the new port, in my case 2222:
sudo ufw allow 2222
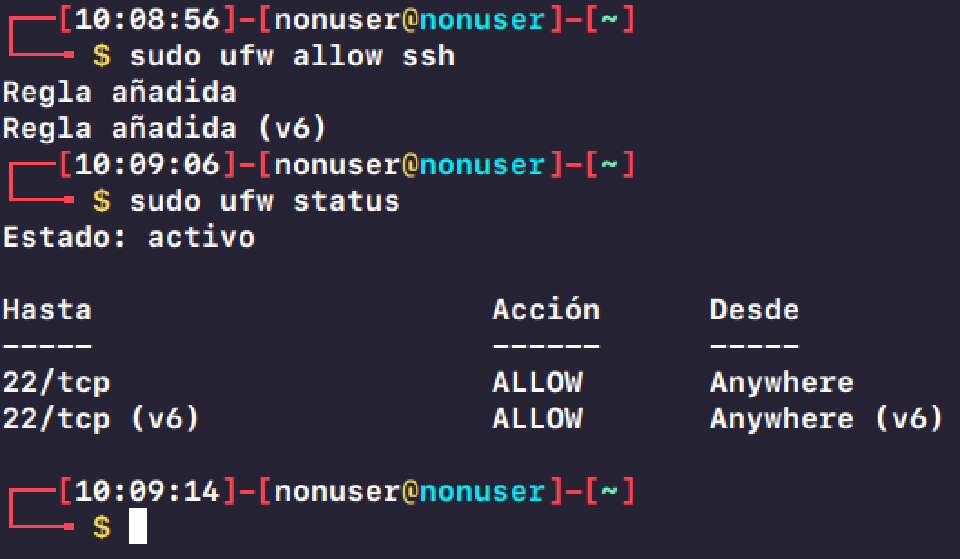
By running status it should print the new UFW rules:
sudo ufw status
Login Grace Time
The logingracetime parameter is the max time the user is allowed to try to log in. By default is at 2 minutes but can be modified.
Chroot Directory
By default, ChrootDirectory is set to “none”. Setting a Chroot directory allows to restraint a user from accessing any other folder than the specified (but can move freely in that directory), in common words we could say that is a jail.
Disabling Root Login
One of the most important reasons it should be disabled is that sending the root password via common traffic is not wise. Instead, is best to log in as a normal user, and then do privilege escalation to the root user as the access is local.
We need to modify the PermitRootLogin parameter from prohibit-password to no.
sudo nano /etc/ssh/sshd_config
And restart SSH:
sudo systemctl restart ssh
Usage of SSH Keys
Instead of a password, we can use a pair of keys (SSH Keys). One is the Public Key which identifies the server, and the other is the Private Key which identifies the client that will connect to the server.
I found a good explanation of why public and private keys are used on this page.
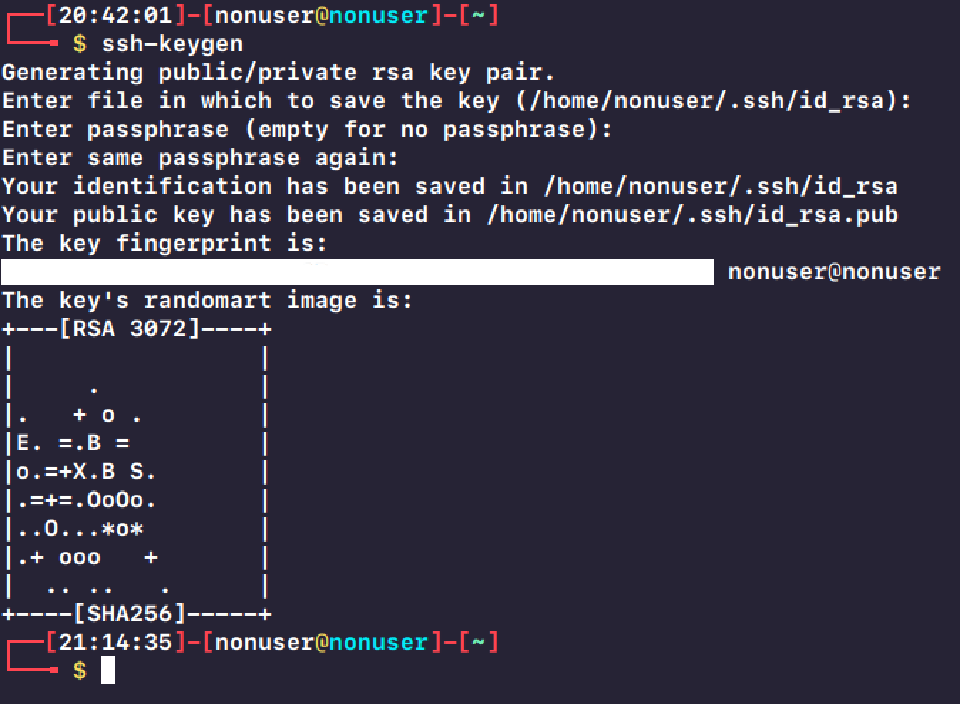
To generate these keys we just run this command:
ssh-keygen
It will ask us for the location where the keys id_rsa (Private Key) and id_rsa.pub (Public Key) will be saved, the default is .ssh folder.
To use them we issue the same ssh command but with the argument -i (identity_file):
ssh -i id_rsa username@hostname
If no password was set when creating the keys we should connect directly to the server.
Remove Password Access
Warning! ⚠
If you remove the possibility to use a password to log in and accidentally you lose the Private Key you won’t have access to the server unless you get again the Private Key.
We need to modify the PasswordAuthentication from yes to no.
sudo nano /etc/ssh/sshd_config
Result: PasswordAuthentication no
And restart SSH:
sudo systemctl restart ssh
Disallow Users with no Password set
When creating a user there’s the option of using SSH without a password, but it’s very risky!!
We can disallow it by removing the # before PermitEmptyPasswords.
sudo nano /etc/ssh/sshd_config
Result: PermitEmptyPasswords no
And restart SSH:
sudo systemctl restart ssh
Setting a max of Auth tries
After many tries of login in Windows or Android, they may lock themself due to the prevention of theft. In SSH we can enable the same.
We can modify the MaxAuthTries from 6 to what we want, in my case I’ve set it to 3. This way if we fail 3 times the connection will drop.
sudo nano /etc/ssh/sshd_config
Result: MaxAuthTries 3
And restart SSH:
sudo systemctl restart ssh
AFK timeout
We as System Administrator may not want a user to chew the resources away if they are being idle.
So, to modify it we can change the ClientAliveInterval from 0 (infinite) to what we want. In my case, I’ve set it to 5 minutes (300 seconds).
sudo nano /etc/ssh/sshd_config
Result: ClientAliveInterval 300
And restart SSH:
sudo systemctl restart ssh
Limit Access to some Users
If we have a multiuser server we may want some users to not have SSH access.
An example could be that it’s a paid option of our server, or that we just want a colleague to have access to the resources of the server.
To allow only some users we can append the AllowUsers user1 user2 ... parameter at the end of the file (where you want really).
sudo nano /etc/ssh/sshd_config
Result: AllowUsers nonuser aNewUser
And restart SSH:
sudo systemctl restart ssh
Endlessh
Link to Github.
As the description says:
Endlessh is an SSH tarpit that very slowly sends an endless, random SSH banner. It keeps SSH clients locked up for hours or even days at a time.
The idea is putting the real SSH server on another port not as common as 22 or 2222, so botnets or malicious hackers that try to execute exploits, rootkits, etc., or brute force your server, will get stuck and can’t do anything else.
Installation
First, we need to download the repository:
git clone https://github.com/skeeto/endlessh
Then we need to enter the folder and compile the program:
cd endlessh
make
It shouldn’t throw you any error, but if it does:
sudo apt install libc6-dev -y
Now we can move the final executable to the local user binaries folder (which is in the PATH), to be able to use it from any folder:
sudo mv endlessh /usr/local/bin
If we want to execute it as a service, to make it run whenever the computer is powered, we can run:
sudo cp util/endlessh.service /etc/systemd/system
sudo systemctl enable endlessh
What this does, is copying the service file to the services folder, and then enable Endlessh to run on boot.
Configuration
We need to create the config file:
mkdir -p /etc/endlessh
printf "Port 22\nLogLevel 1" | sudo tee -a /etc/endlessh/config > /dev/null
You can change the port from 22 to 2222.
There are more configuration parameters in the repository.
That’s it!
Fail2Ban
Link to webpage.
I have a post about Fail2Ban.
Apart from the normal configuration, what interests us here is changing these lines:
# To use more aggressive sshd modes set filter parameter "mode" in jail.local:
# normal (default), ddos, extra or aggressive (combines all).
# See "tests/files/logs/sshd" or "filter.d/sshd.conf" for usage example and details.
#mode   = normal
port    = ssh
logpath = %(sshd_log)s
backend = %(sshd_backend)s
In this case, changing the port if needed (default is 22) and change the mode if anything.