RubberSpark
Published on

Contents
Introduction
Watching Mr. Robot I got impressed by Rubber Ducky and how you could inject code to a PC by emulating a keyboard, so I decided to get one.

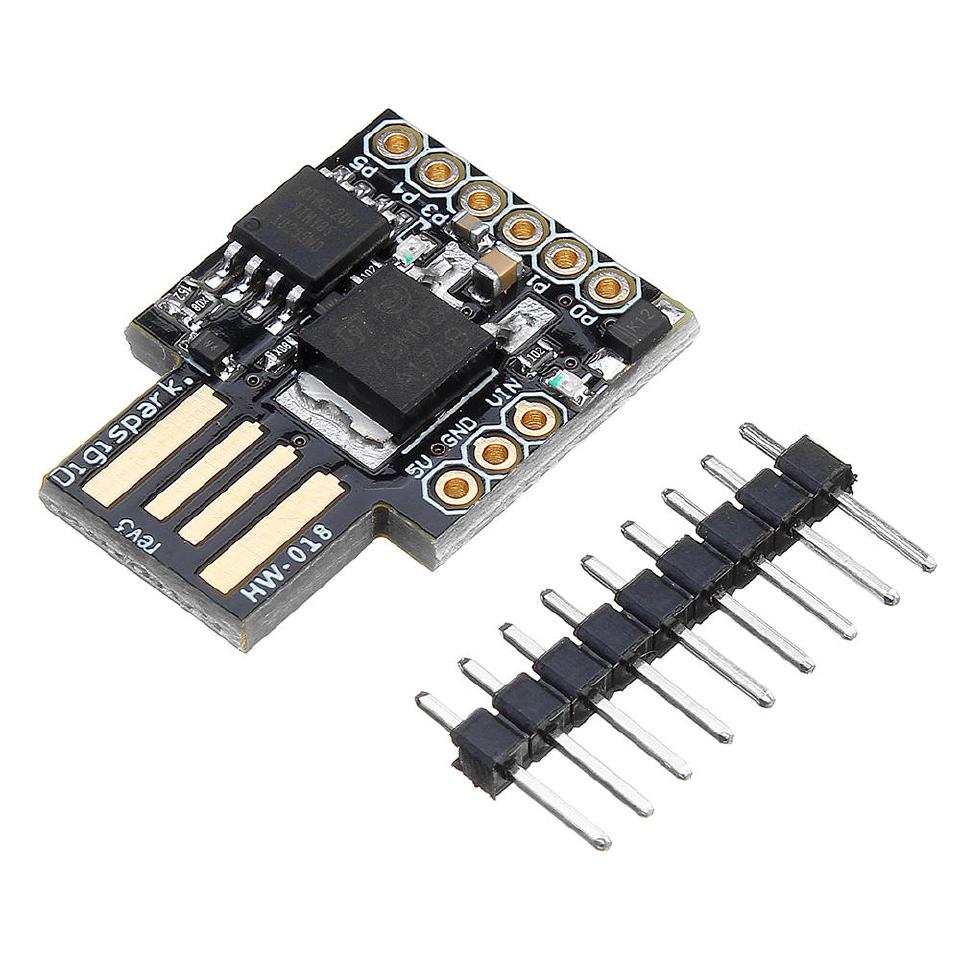
Unfortunately, it costs 60€ in Spain, so I searched over the internet how I could replicate the same idea and firstly I found that pen drives with Physon driver could do that, but to buy one with it is a bit of a lottery. So next was DigiSpark, which is a tiny Arduino board with a USB output, and 3 of them in Amazon costs around 12€, so it’s very cheap.

DigiSpark can also inject code but it’s a little bit trickier. In Rubber Ducky you have to put the file.duck in its filesystem; here we have to write the .duck and transform it to a .ino Arduino readable.
Installing Arduino and DigiSpark Drivers
To install Arduino, first download it from Arduino IDE Download, scroll down and select linux 64 bits. When download it go to the directory and extract, if via CLI:
tar -xf arduino*.tar.xz
Then move that folder to /opt/ and enter it. Run ./install.sh and done!
sudo mv arduino*/ /opt/
cd arduino*
sudo ./install.sh
In general, when installed it should have created a symbolic link in /usr/local/bin/arduino, so it should work just by executing sudo arduino.
Then run arduino and in File go to Preferences, in Additional Board Manager URLs write this ↓ and press OK.
http://digistump.com/package_digistump_index.json
After that, go to Tools, then Board, and Boards Manager. In the search bar, put Digistump and click install on Digistump AVR Boards. Then select in Board the option Digispark (Default - 16.5mhz) and that’s it for this part!
Coding .duck
Rubber Ducky language is very simple there are few commands, the rest is up to your imagination and skills!
Commands:
REM Helloits for commentariesSTRING Holawrites and entire stringDELAY 20enters a sleep/wait
Keys:
ENTERGUI,SHIFT,ALTGUI is the Windows or the Mac keyLEFT,UP,DOWN,RIGHTbasic movement keysCTRL-SHIFT ENTERfor key combos
RubberSpark Framework
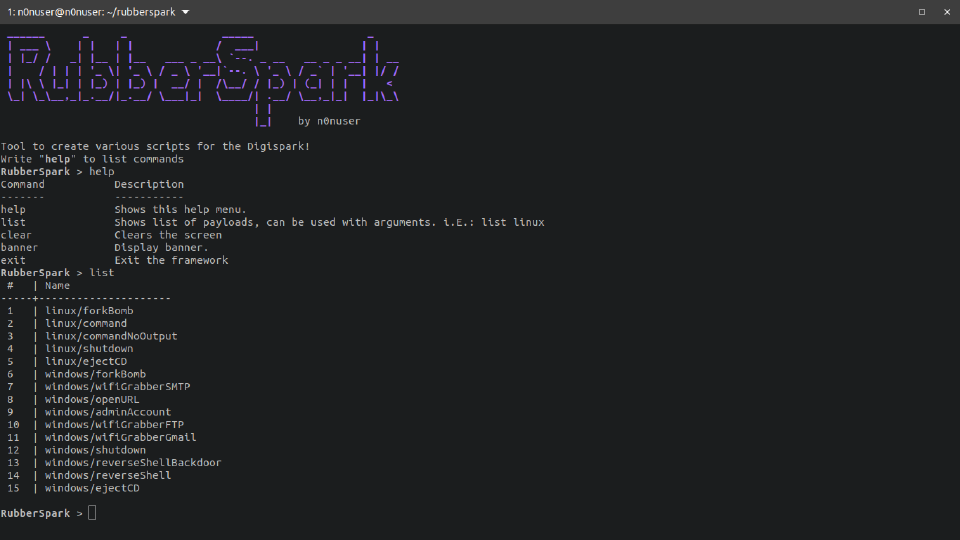
RubberSpark is a modular and light-weight framework that aims to provide all the Ducky scripts that you may need in a Red Teaming engagement.
It delivers Ducky Scripts with modifiable parameters (e.g: Reverse Shell. You need to introduce an IP and a Port).
Screenshots


Usage
git clone https://github.com/n0nuser/rubberspark
cd rubberspark
python3 rubberspark.py
Commands
Command           Description
-------           -----------
help              Shows this help menu.
list              Shows list of payloads, can be used with arguments. i.E.: list linux
clear             Clears the screen
banner            Display banner.
exit              Exit the framework
Converting DuckyScript to Arduino
For this Marcus Mengs created two python scripts that transform .duck to .bin (DuckEncoder) and .bin to .ino (Duck2Spark).
After saving the .duck script, you can either directly use it in a RubberDucky; or in case of using it in a DigiSpark, you can use the ccRun.sh script that uses both MaMe82’s Duck2Spark and DuckEncoder. This automates the task of compiling the script all the way directly to an Arduino sketch.
Be sure to change the locale and the Arduino path if needed!
This is the code of the Bash script:
#!/bin/bash

## n0nuser
## https://github.com/n0nuser/rubberspark

#####################
# CHANGE THESE VALUES

## e.g.: PATH_ENCODER =
PATH_ENCODER="resources/duckEncoder/duckencoder.py"

## e.g.: PATH_DUCK2SPARK =
PATH_DUCK2SPARK="resources/duck2spark.py"

## e.g.: PATH_ARDUINO = "arduino"
PATH_ARDUINO="arduino"

KEYBOARD_LANG="es"
#####################

file=$(echo $1 | cut -f 1 -d '.')

encoder="python $PATH_ENCODER -l $KEYBOARD_LANG -i $file.duck -o $file.bin"
spark="python $PATH_DUCK2SPARK -i $file.bin -o $file.ino"
arduino="sudo $PATH_ARDUINO $file.ino"

$($encoder)
$($spark)
$($arduino)
To convert the .duck file into a .ino directly just run:
chmod +x ccRun.sh
./ccRun.sh myDuckyScript.duck
Adding modules
It’s as easy as adding a module in each OS folder in core/modules/.
You can request an issue to upload a python file with the same structure to keep it in the repo in the future!
Structure of python file:
class info:
    author="AUTHOR"
    description = "DESCRIPTION OF MODULE"
    function = "ITS USE"
    parameters = [ "IP", "PORT" ]
    content = """\
DUCKY
COMMANDS
HERE\
"""
Disclaimer
Do not attempt to violate the law with the framework. If you plan to use it for illegal purposes, then please be sure you have explicit permission, else deny doing it.
I will not hold responsibility for any of your actions.
Don’t stick the DigiSpark to the PC for now!
Uploading the code
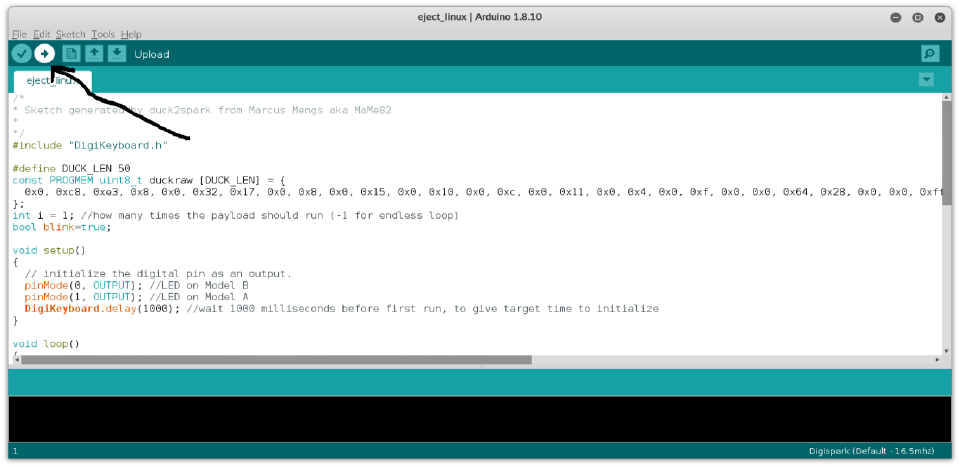
And it will open the script compiled in .ino with Arduino, now to upload the script to DigiSpark, click this button:

And then plug the DigiSpark 🐦️
And that’s it for this project tutorial!